Posts mit dem Label japanese cuisine werden angezeigt. Alle Posts anzeigen

Montag, 26. September 2011

Okonomiyaki Recipe (Okonomiyaki Rezept)

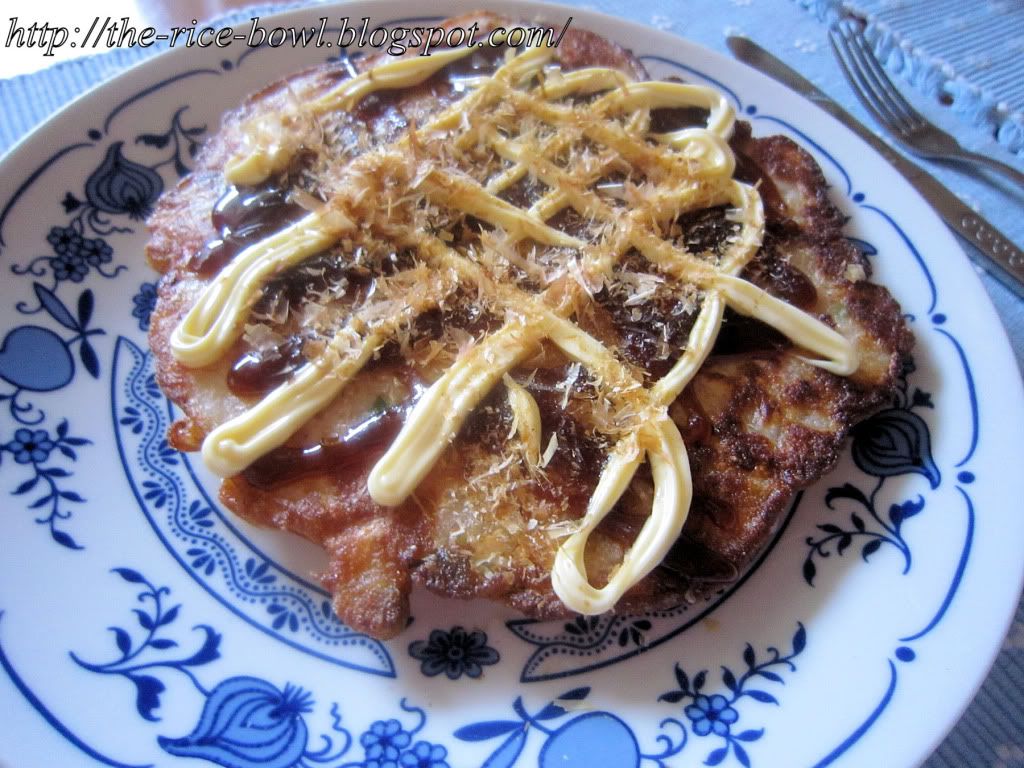
I'm making okonomiyaki, the Japanese style pancake, for quite some time now and despite it's unhealthiness, it's just so delicious, I have to cook it every now and then.
Since I have some experience, I've changed the recipe quite a lot... I'm highly allergic to shellfish, so this version of Okonomiyaki isn't containing any! If you like, you can add shrimps, octopus and calamari as much as you like!

This is for Okonomiyaki as main dish - one per person.

Okonomiyaki for 6 (800kcal/serving):

200g bacon
10 leaves of Chinese cabbage
200g Chinese yam
50g spring onions
3tbsp beni-shoga (red pickled ginger)
2 eggs
500g flour
2tbsp baking powder
600ml dashi stock
30g tempura flour (to make Tenkasu)
salad oil
salt
okonomiyakisauce (commercial)
mayonnaise
dried bonito flakes
(optional) aonori

1. Seperate the cabbage into hard part and leaves. Chop the stem part thinly and cut the leaves into 1cm pieces.
2. Cut the spring onions into rings. Grate the yam. Chop the beni shoga into fine pieces. Cut the bacon strips into 3cm pieces!
3. Let's make tenkasu! Mix tempura flour with water to make an almost fluid batter.
4. Now we're going to deep fry the batter. Heat enough oil in a pan to ca. 180°C. Add the batter drop by drop and fry until golden brown! Remove from the oil and lay on a plate covered with a kitchen towel.
5. Let's make the Okonomiyaki batter! Put flour in a big bowl. Add the dashi stock little by little and whisk. Add the grated yam.
6. Now add the ingredients. Add the cabbage, spring onions and ginger.
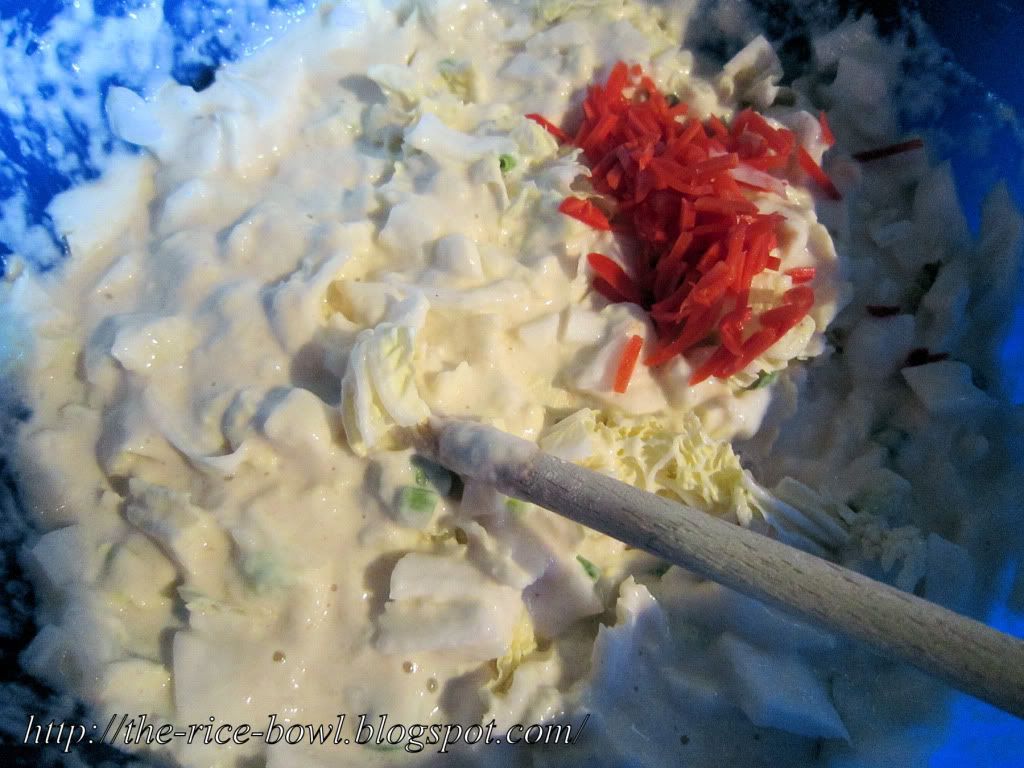

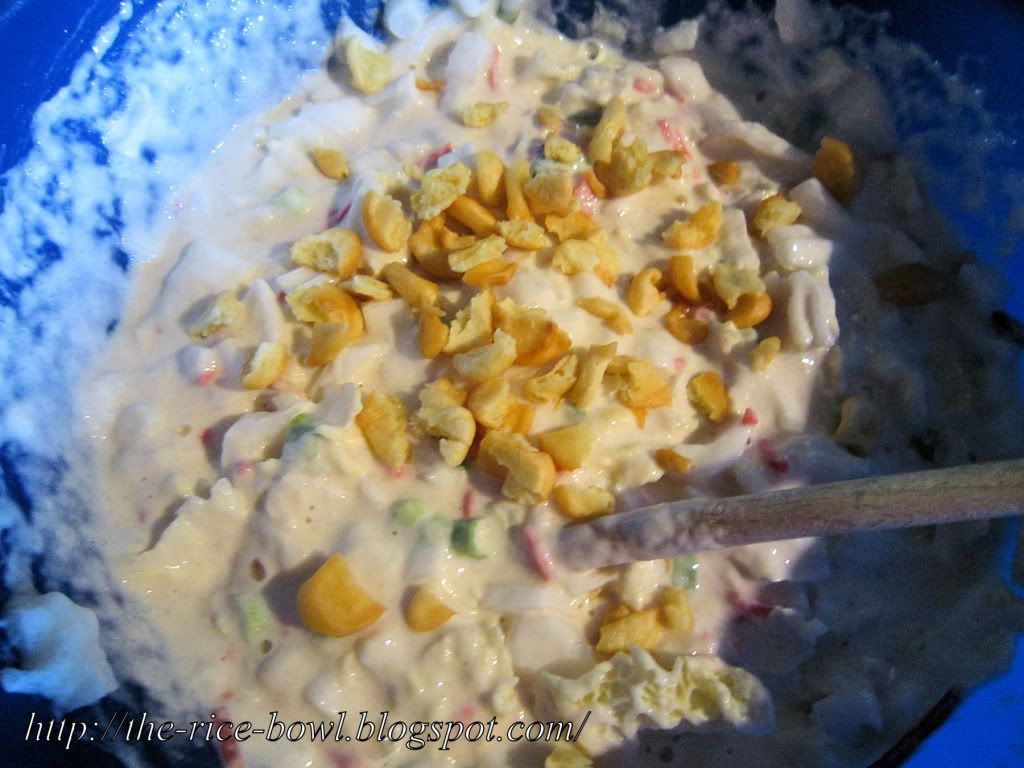
7. When the tenkasu has cooled down, add it as well and mix everything.

8. Let's make Okonomiyaki! In a pan, bring 2tbsp of salad oil to medium heat.
9. Pour 1/5 of the dough in the hot pan and quickly bring it into round shape!
10. Lay 1/5 of the bacon on top. Add a little more dough fluid on top, so the bacon will stick when it's turning time.
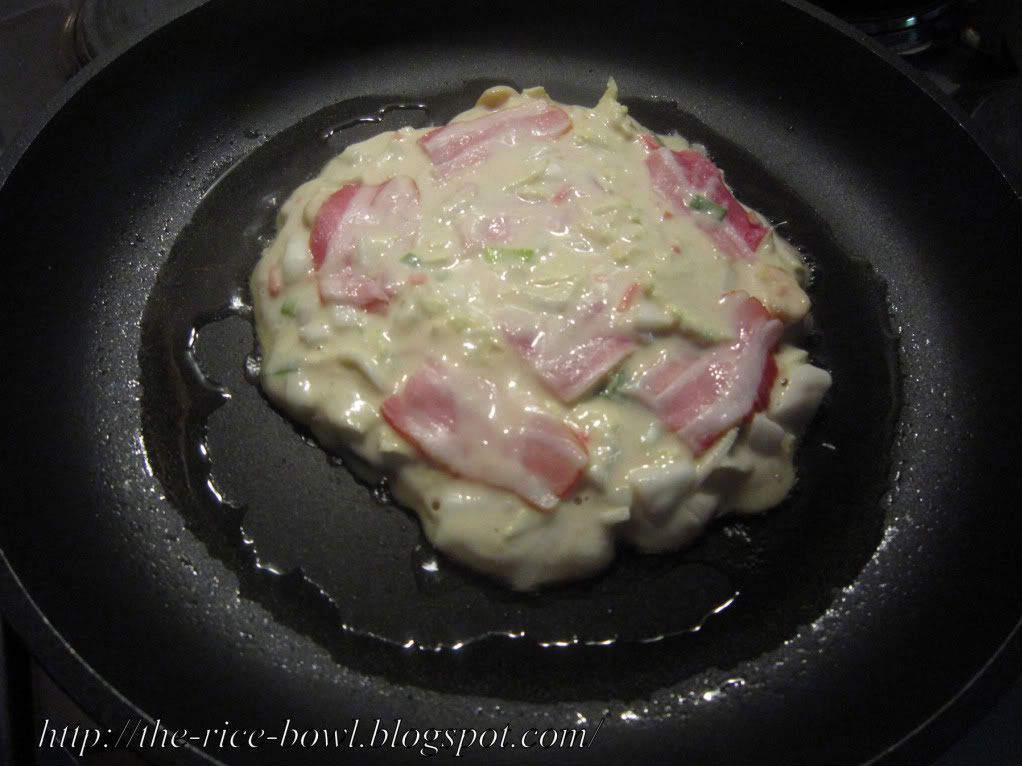

11. When the downside is browning and bubbles appear on the upper side, you have to flip the okonomiyaki over!
12. Fry until cooked through, then remove from the pan and repeat for the rest dough.
13. At the end, put on Okonomiyakisauce, mayonnaise and sprinkle bonito flakes and aonori!

いただきます!

Sonntag, 17. Juli 2011

California Rolls Uramaki Recipe Tutorial

I love sushi and I love to cook. But I hate cooking sushi! Blabla, I know it's not cooking but you know what I mean. It's not the time or that you have to stand all the time. I'm just not very good at it, period. The rice, the rolling the taste. It's not working very well. Lately I've improved, but still...
So, I was a little intimidated when the Chibichef asked for California Rolls (funnily they're under Japan, but were invented in the USA)

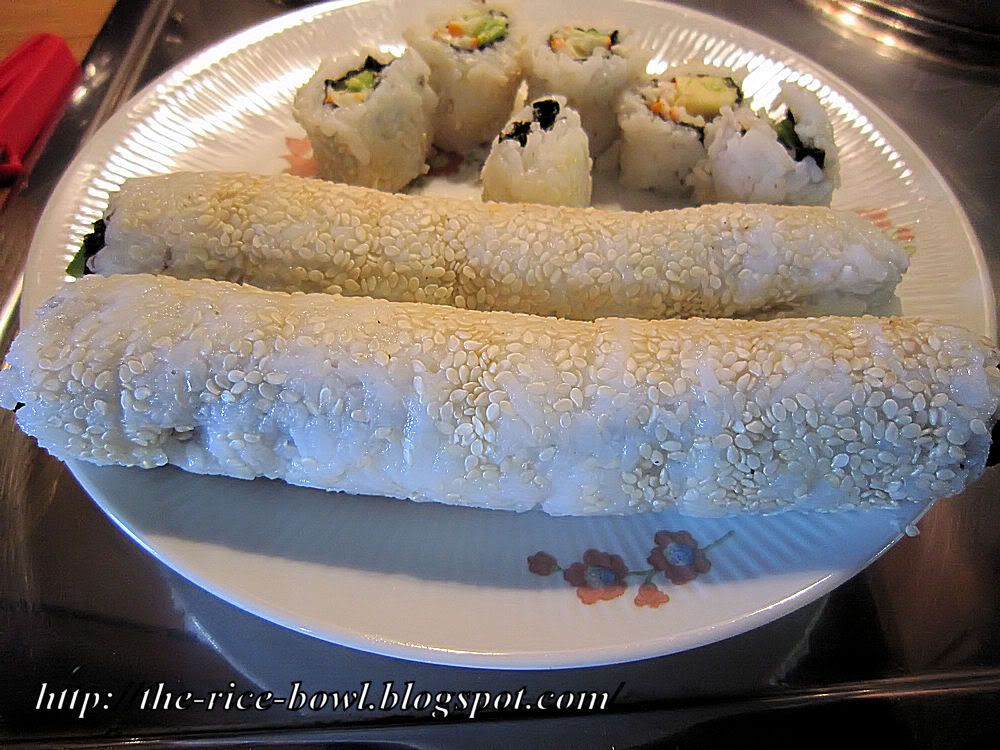
What can I say? I think I nailed it! It went really well and I think I'll try this again.


California Roll for 4 (550kcal/portion):

400g hot cooked sushi rice (before cooking, wash the rice like 6,7 times ; cook it with 2tbsp sake and a piece of kombu)
   For sushi vinegar:
3tbsp rice vinegar
3tbsp sugar
2tsp salt
   Filling:
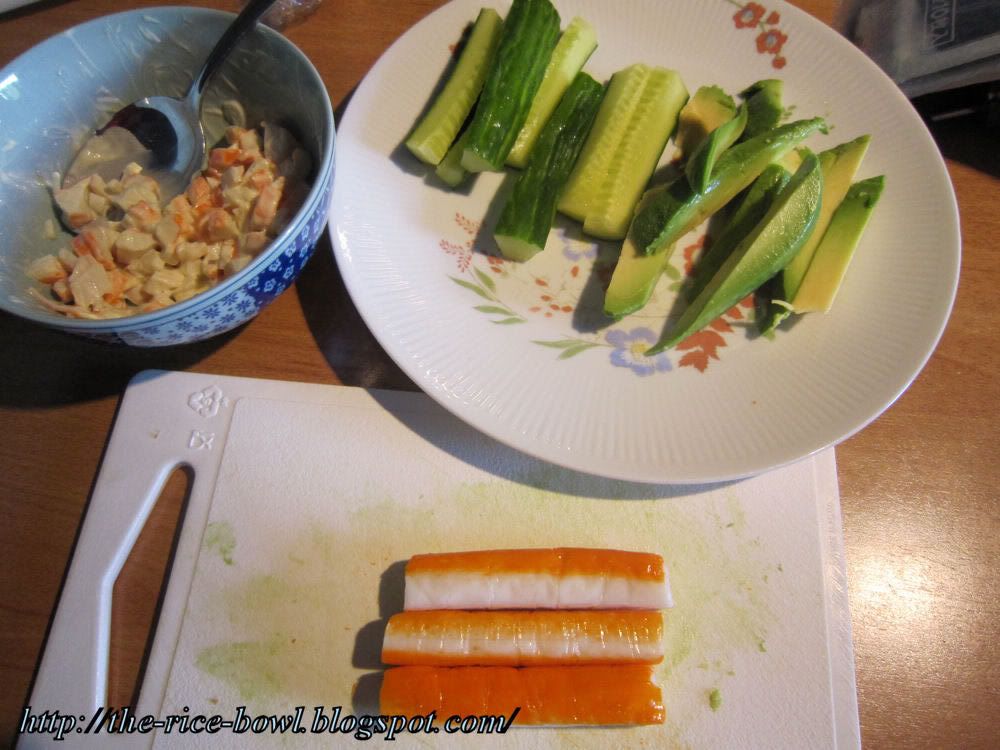
200g crab meat (I'm allergic, so I used surimi - it's 12 picks here)
2tbsp mayonnaise
salt
1/2 cucumber
1 avocado
Nori sheets (I'm not quite sure how many, so get a pack)
white sesame
wasabi paste
makisu
foil

1. Mix the ingredients for sushi vinegar. Pour them over the hot sushi rice and stir, but be careful not to squeeze the grains. Cool down.
2. Wash the cucumber. Cut into 1/8 pieces. Remove the soft part.
3. Peel the avocado. Make a lengthwise cut around the avocado and then move it slightly, so you can remove the stone easily. Cut the avocado into 1cm sticks.
4. In a bowl, take half of the crab meat (or surimi) and tear. Add mayonnaise and salt to your taste and mix well. You can keep the other half as it is.
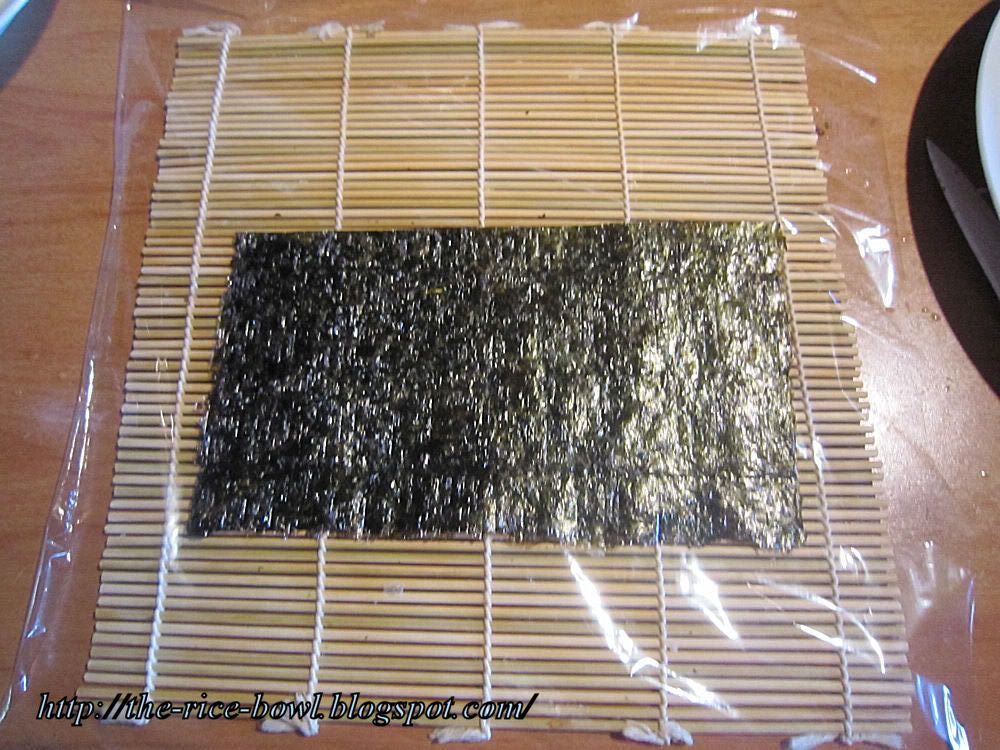
5. Cut the nori into half.


6. Let's roll! The cooking guide has a really weird technique here, that I won't show you. They roll up the filling first, then put rice in a foil and wrap it around the nori ... it's weird. I'll show you my way! :)
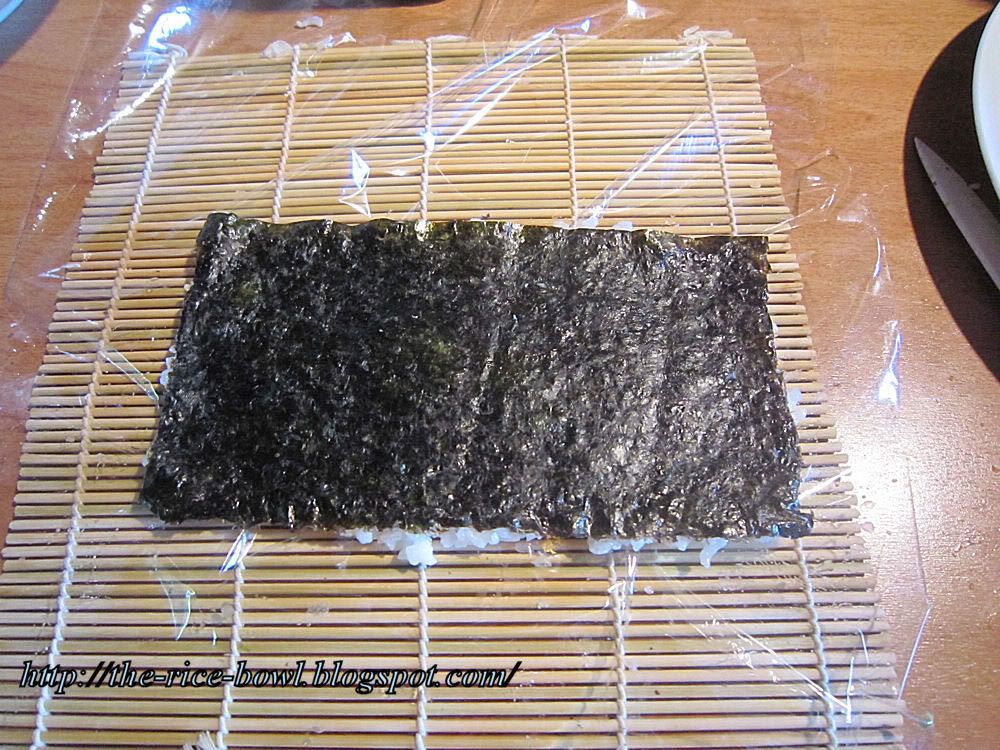
7. On your makisu, spread a large piece of foil. But the sheet of nori on top.


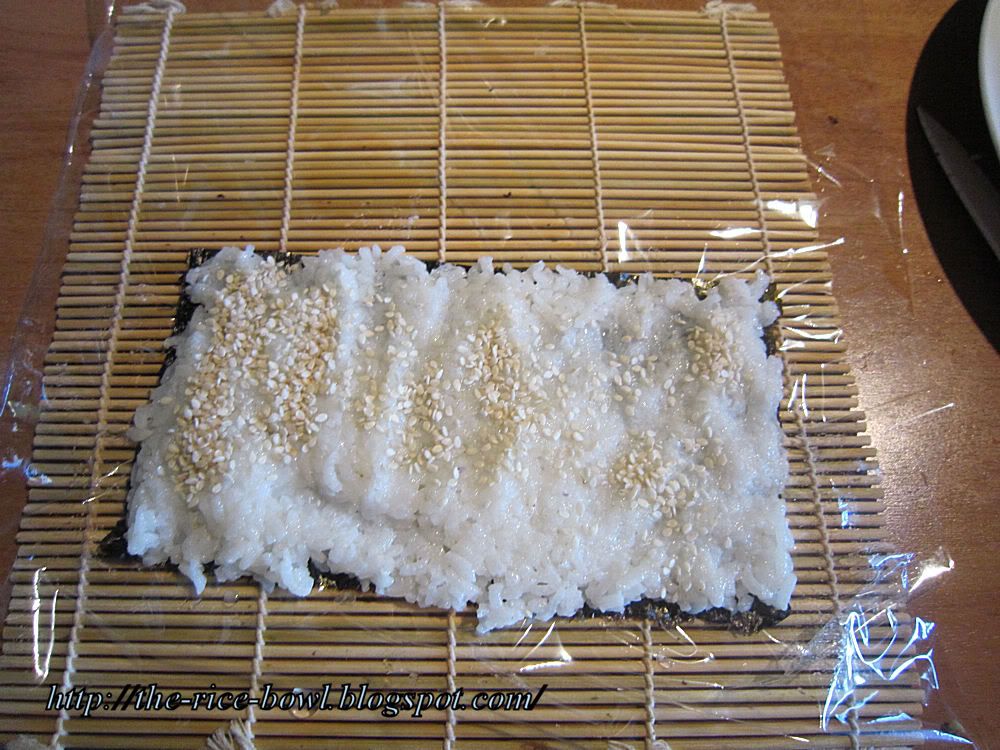
8. With wet hands spread a thin layer of rice and for California maki, don't forget the corners. :) Sprinkle sesame seed.


9. Now it's getting a little tricky. Flip your nori sheet, but the foil and makisu have to lay still.


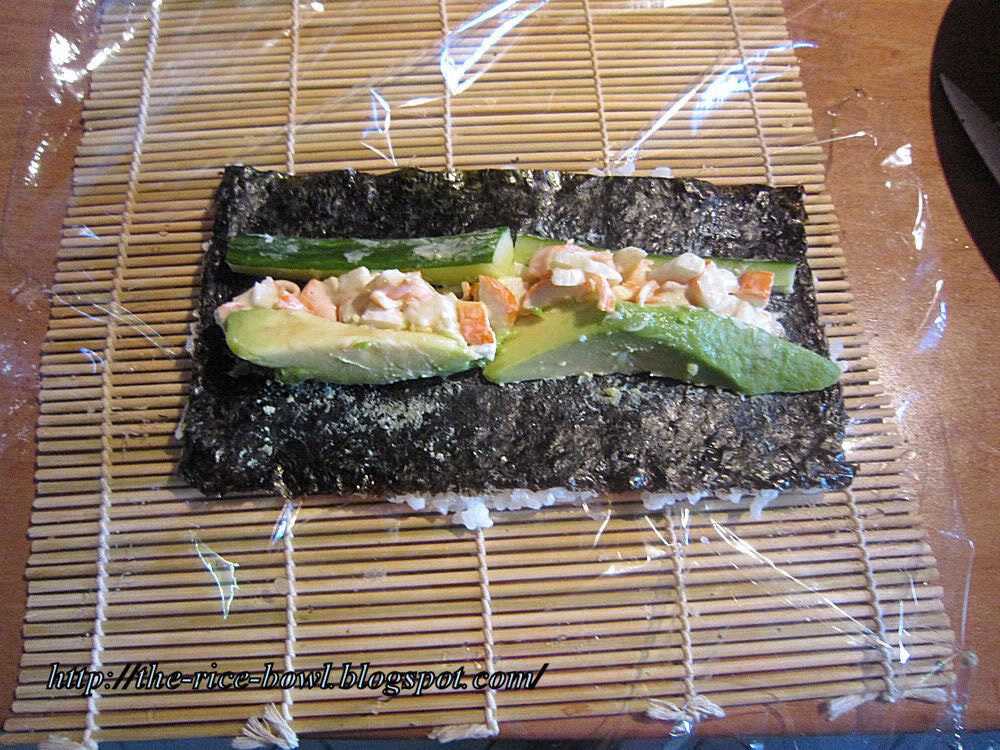
10. Now spread a little wasabi in the middle. Thanks to the mayonnaise it's not neccessary here but I like it. Lay on the filling you like.


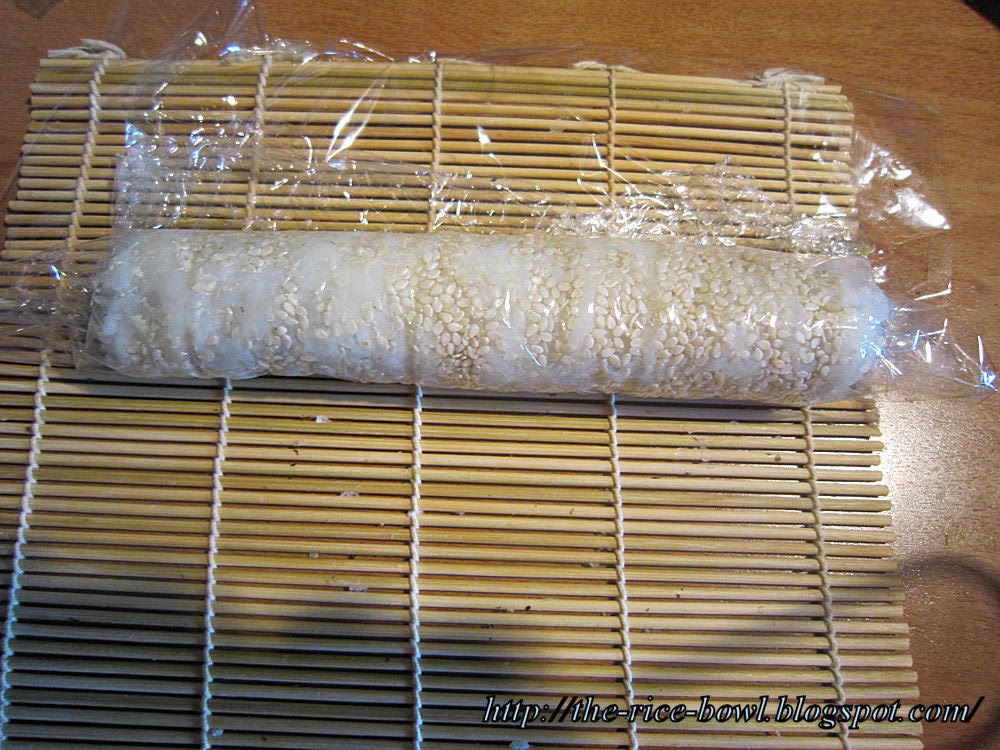
11. Now, bring the ends of the makisu together. With your hand, press the fillings inside and make a roll. Make it really firm, always pressing from all sides. The makisu will help you with this.


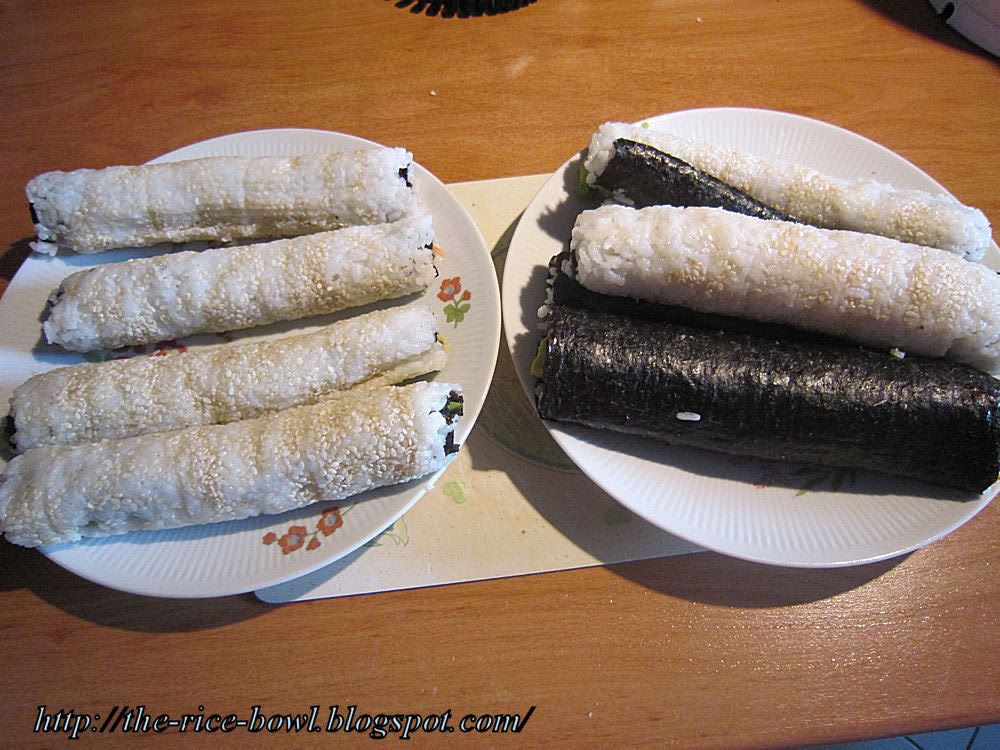
12. Repeat as long, as you have rice and filling. You can also mix it up. :)


13. With a wet knife, cut one roll into half. Than cut every half into 3 pieces.


14. Done! いただきます!

You can also use small caviar (masago) instead of sesame and shrimps or tuna instead of crab. Decorate with mayonnaise or a wasabi leaf.

This recipe might not be the most usefull, since you can learn how to make sushi ... EVERYWHERE. I hope, you still like it. :)

Montag, 20. Juni 2011

Tutorial: Smart Bento Packing

Lots of people don't know how to pack their bentos effectively. Packing is very important and when done wrong, the food might mix and all your work wasted. You don't want that. Believe me.
So this time, I'll show you how to smartly pack your box, that your bento looks and tastes fine!
There are 7 easy steps with pictures!.

Pack in a shallow box.

Make sure to completely fill the box. If it's not fully packed, the food will get out of place during transportation, look unappetizing and maybe mix tastes. Be sure, that the foods abut and they won't move.

Step 1: Carbohydrates
Fill 1/3 with warm rice (cool rice is hard to mold and pack easily), noodles, bread or whatever your carbohydrates may be.


Step 2: Fixed Shaped Food
Food that has an unbending shape like meat or deep fried food should be put in next.


Step 3: Juicy Food
Salads or moist food like cucumber salad should be drained before filling in a deep, waterproof containe (silicone muffin mold) to be seperated from the rest.


Step 4: Shapable Food
Food, that can be slightly squeezed like omelet should be added now.


Step 5: Room Fillers
Fill any space with preserved food like olives or small containers. Cherry tomatoes, pickles, fruit and sauce bottles work well. Mind the colours, so it looks appetizing!


Step 6: Finish
Upgrade rice with nori or sprinkles. Add party picks, shapes from cheese or sausage or patterns.


Step 7: Closing
Cool completely before placing lid. The steam from warm food makes the food soggy and perishable at warm temperature.


This is an easy bento with classics like sausages, omelet and cucumber! I hope you'll try this out and tell me about your results!